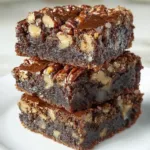
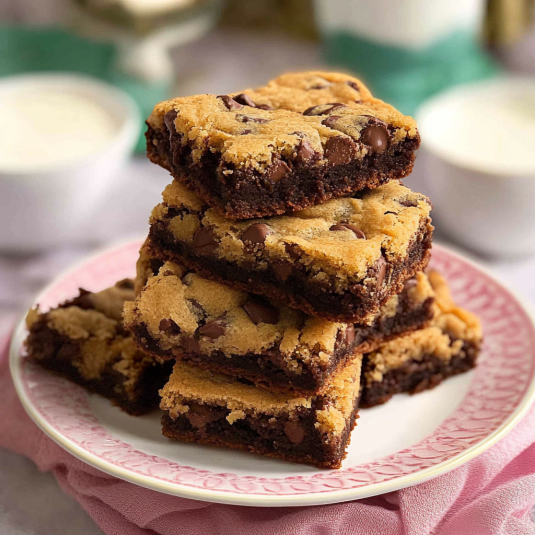
When you want dessert, the choice often feels split. Do you go for a fudgy brownie or a chewy cookie? Both sound right, and picking one can feel like a letdown. Brookies fix that problem by giving you both textures in one pan. You get a rich brownie base with a soft cookie layer on top, baked together so every bite feels balanced.

I tested this recipe many times to get it right. I played with butter levels, sugar ratios, and bake times until the layers baked evenly and stayed together. The goal was simple. No dry edges, no raw center, and no cookie layer sinking into the brownie. What came out is a reliable brookies recipe with clean layers, deep chocolate flavor, and a soft but set center every time.
Table of Contents
I tested this recipe:
I tested this recipe using both glass and metal baking pans, and I found that metal pans give the brookies crispier edges.
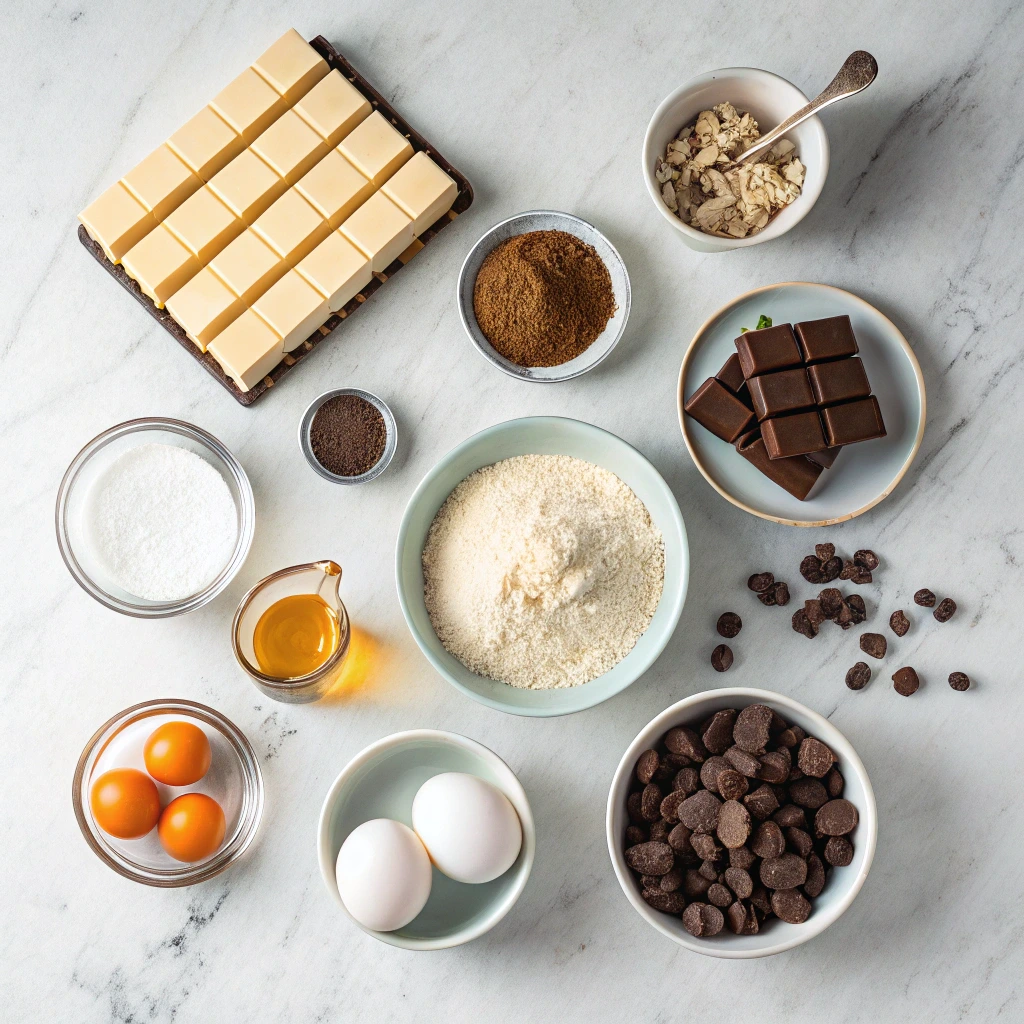
Ingredients and Why They Matter
Each ingredient has a clear job. Small changes here affect texture, flavor, and how the layers bake together.
Unsalted Butter
Unsalted butter gives you control. You decide how much salt goes in, which keeps the brownie rich and the cookie balanced. Soft butter also mixes smoothly, which helps both layers bake evenly.
Brown Sugar and White Sugar
This mix is key. Brown sugar adds moisture and chew, which keeps the cookie layer soft. White sugar gives structure and helps the brownie set instead of staying loose in the center.
Eggs
Eggs bind everything together. In the brownie layer, well mixed eggs help create a shiny top and a fudgy middle. In the cookie dough, they give just enough lift without making it cakey.
Dark Chocolate
Use dark chocolate around 70 percent for the brownie base. It adds depth and keeps the bars from tasting too sweet once the cookie layer bakes on top.
Cocoa Powder
Cocoa powder boosts the chocolate flavor without adding extra fat. Dutch style cocoa gives a smoother taste, while natural cocoa adds a sharper bite. Both work, but the texture stays more even with Dutch style.
Flour
Flour gives shape. Too much makes the bars dry. Too little makes them fall apart. Measure carefully so the brownie stays dense and the cookie stays soft.
Vanilla Extract
Vanilla rounds out the chocolate flavor. It does not stand out on its own, but without it the bars taste flat.
Sea Salt
A small amount of salt sharpens the chocolate and balances the sugar. Sprinkling a little on top before baking adds contrast in every bite.
Ingredient Measurements
You can use cups or grams. Grams give more consistent results, especially for baking.
| Ingredient | Cups | Grams |
|---|---|---|
| Unsalted butter | 1 cup | 225 g |
| Brown sugar | 1 cup packed | 200 g |
| White sugar | 3/4 cup | 150 g |
| All purpose flour | 1 1/4 cups | 155 g |
| Cocoa powder | 1/2 cup | 50 g |
| Dark chocolate | 6 oz | 170 g |
| Chocolate chips | 1 cup | 170 g |
| Eggs | 3 large | 150 g without shell |
| Vanilla extract | 2 tsp | 10 g |
| Sea salt | 1 tsp | 5 g |
Substitutions
If you are missing an ingredient, these swaps work without changing the final texture too much.
- Butter in the brownie layer:
You can replace melted butter with a neutral oil like vegetable or sunflower oil. Use the same amount. This keeps the brownie moist, but the flavor will be slightly less rich. - Brown sugar:
If you do not have brown sugar, mix white sugar with a small amount of molasses. Use 1 cup white sugar plus 1 tablespoon molasses. This keeps the cookie layer soft. - Dark chocolate:
Semi sweet chocolate works if dark chocolate is not available. The result will be a bit sweeter, but the layers will still bake correctly. - Chocolate chips:
Chopped chocolate bars can replace chips in both layers. Cut them into small pieces so they melt evenly.
Step by Step Instructions
Follow these steps in order. Pay attention to how the batter and dough look and feel. Those visual cues matter more than the clock.
1. Make the Brownie Base
Heat the oven and line a 9×13 pan with parchment paper, leaving extra paper hanging over the sides. This helps with lifting later.
Melt the butter and dark chocolate together until smooth. Let it cool slightly. In a bowl, whisk the eggs and white sugar until the mix looks thick and glossy. This step helps create that crackly top. Stir in vanilla, then add cocoa powder, flour, and salt. Mix just until smooth. The batter should look shiny and flow slowly when poured.
Spread the brownie batter evenly into the pan.
2. Prepare the Cookie Layer
In a separate bowl, beat the soft butter with the brown sugar until light and fluffy. This takes about three minutes. The color should look lighter and the texture should feel airy.
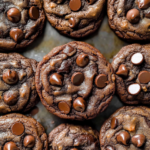
Add the egg and vanilla and mix until combined. Stir in the flour, salt, and chocolate chips. The dough should feel soft but not sticky.
3. Assemble the Brookies
Do not spread the cookie dough directly. Instead, scoop small balls of dough and place them across the brownie batter. Gently press each one flat with your fingers. Leave small gaps so the dough can spread as it bakes. This method keeps the layers even and stops the cookie from sinking.
Bake until the edges look set and the center has a slight wobble when you gently shake the pan. Let the pan cool on a rack before slicing.
Print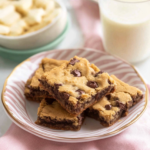
Brookies
- Total Time: 55 minutes
- Yield: 16 bars 1x
- Diet: Vegetarian
Description
Rich, fudgy brookies with a soft brownie base and a chewy cookie top baked together in one pan. Clean layers, deep chocolate flavor, and a soft but set center every time.
Ingredients
- 1 cup unsalted butter
- 1 cup packed brown sugar
- 3/4 cup white sugar
- 1 1/4 cups all purpose flour
- 1/2 cup cocoa powder
- 6 oz dark chocolate (70%)
- 1 cup chocolate chips
- 3 large eggs
- 2 tsp vanilla extract
- 1 tsp sea salt
Instructions
- Preheat the oven to 350°F (175°C) and line a 9×13 pan with parchment paper, leaving overhang on the sides.
- Melt the butter and dark chocolate together until smooth and let cool slightly.
- Whisk the eggs with the white sugar until thick and glossy.
- Stir in vanilla, then add cocoa powder, flour, and salt and mix just until smooth.
- Spread the brownie batter evenly into the prepared pan.
- In a separate bowl, beat the soft butter with brown sugar until light and fluffy.
- Add the egg and vanilla and mix until combined.
- Stir in the flour, salt, and chocolate chips until a soft dough forms.
- Scoop small portions of cookie dough and place them evenly over the brownie batter.
- Gently press each piece slightly flat, leaving small gaps.
- Bake for about 35 minutes until the edges are set and the center has a slight wobble.
- Cool completely in the pan before lifting out and slicing.
Notes
Chill the cookie dough for 20 minutes before assembling to prevent excess spreading. Let the brookies cool fully for clean slices and defined layers.
- Prep Time: 20 minutes
- Cook Time: 35 minutes
- Category: Dessert
- Method: Baking
- Cuisine: American
Nutrition
- Serving Size: 1 bar
- Calories: 398
- Sugar: 32g
- Sodium: 208mg
- Fat: 22g
- Saturated Fat: 13g
- Unsaturated Fat: 7g
- Trans Fat: 1g
- Carbohydrates: 48g
- Fiber: 3g
- Protein: 5g
- Cholesterol: 68mg
Secret Pro Tips for Perfect Brookies
These small steps make a big difference. They fix common baking problems and help the layers bake at the same pace.
Chill the Cookie Dough
After making the cookie dough, place it in the freezer for about 20 minutes. Cold dough spreads slower in the oven. This keeps the cookie layer from running to the edges before the brownie sets.
Use the Wobble Test
Brookies are ready when the edges look firm but the center still moves slightly when you shake the pan. That gentle wobble means the inside will stay fudgy as it cools instead of turning dry.
Leave a Parchment Sling
Always let parchment paper hang over the sides of the pan. Once the brookies cool, lift them out in one piece. This makes slicing clean and keeps the layers from cracking.
Rest Before Cutting
Let the brookies cool fully in the pan. Cutting too soon causes the center to fall apart. A cool pan gives neat slices and clear layers.
These tips come from testing the recipe again and again. They help you get the same result every time, even if your oven runs hot or cool.
FAQs
How do you know when brookies are done?
Brookies are done when the edges look firm and slightly pulled from the pan. The center should still move a little when you gently shake the pan. A toothpick pushed into the middle should come out with a few moist crumbs, not wet batter.
What are the common Brookies mistakes?
The most common mistake is baking too long. This dries out the brownie layer. Another issue is spreading the cookie dough in one sheet, which can cause it to sink. Skipping parchment paper also makes removal and slicing harder.
Why are my Brookies taking so long to cook?
This often happens if the pan is glass or very thick, since heat moves slower. Cold ingredients can also slow baking. Check that your oven temperature is accurate and avoid opening the door too often.
How long do I let Brookies cool?
Let brookies cool in the pan for at least one hour. This gives the center time to set. Cutting too early makes the layers fall apart and look underbaked.
Are my brownies undercooked or just fudgy?
If the center looks glossy but holds together once cool, they are fudgy. If the center feels loose and sticks heavily to the knife after cooling, they need more time in the oven.
How long do Brookies last?
At room temperature, brookies keep well for up to five days in a sealed container. In the fridge, they last about one week. In the freezer, they keep their texture for up to three months when wrapped tightly.
Let’s bake together! I will explain all the steps in detail in the written recipe. If you try this recipe, don’t forget to tag me on Facebook, and you can also follow me on Pinterest.